If you are going to integrate Convertifier on your website, then this is a how to guide for you.
This article is divided into two sections depending upon the type of your website: E-commerce and non e-commerce.
Integrating Convertifier with Magento Store
Step 1: Sign up on Convertifier.com with the website you want to integrate. You can always change it later.
Step 2: Following screen will appear:

In the platform option, select Magento. If your website is SSL enabled or is a https website, then enable it else disable it. Enter your website URL and time zone. Enable notification history if you want the history panel to appear on your website. If you want to send welcome notification to your users when they subscribe, enable the ‘welcome notification’ and enter the details of the notification.
Step 3: After saving the details, following screen appears for verification.

Step 4: Download the file from the given link and extract the file in the top level directory of your website. Verify the ownership of the website.
Step 5: After verifying the website, enter the FCM id of your website. (Read this blog on how to generate Firebase cloud messaging or FCM id for your website.) After entering the details, save the update.
Step 6: In the integrate website section, following screen appears after you complete the verification and enter the FCM id.

Step 7: Download the Magento extension and install it on your Magento store. After installing the extension, following screen appears in the Magento backend:

Step 8: Enable the extension by selecting yes. Enter the GCM sender id and Convertifier App id. You can copy the Convertifier app id from the website settings in the Convertifier dashboard.
Step 9: Verify settings in the Convertifier dashboard and you are good to go.
Integrating Convertifier with a non-e-commerce website
For integrating a non-e-commerce website, follow the same steps as mentioned in the step 1 & 2 above. The only difference is that in the ‘platform’ section, select custom.
Step 3, 4 & 5 remain same.
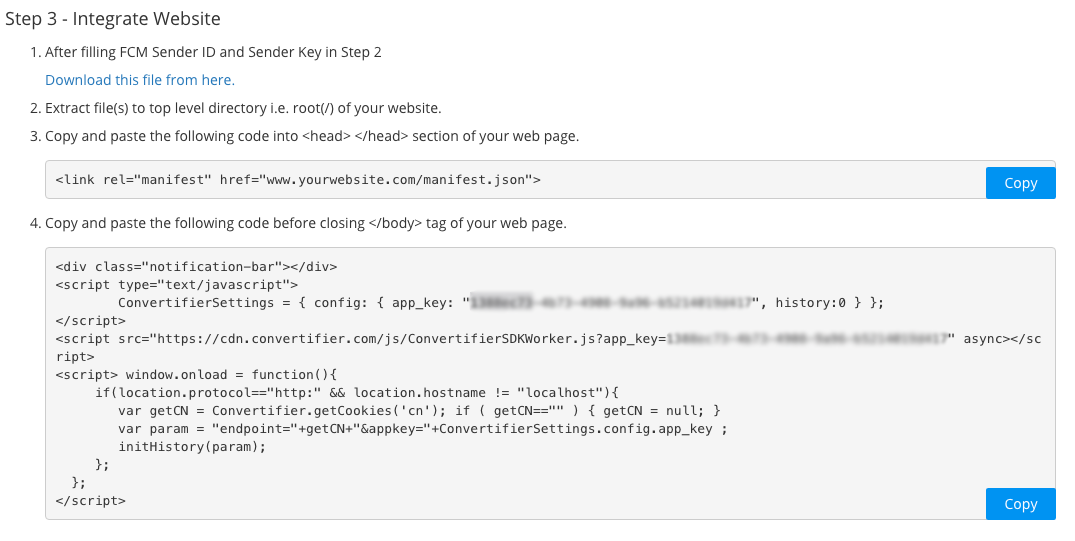
Step 6: Following integration screen will appear:

Download the file from the given link and extract the file to the top level directory of your website. Paste the code as mentioned in the bullet 3 & 4 of the ‘integrate website’ section.
And you are good to go with the dynamic re-targeting for your website.